
Previously in this series of Jira DevOps automation tutorials, we discussed how to trigger a Jenkins build and how to trigger a Bamboo build on successful Git commit.
Now we are looking at a Jira automation for TeamCity. We will walk through how you can automatically trigger a TeamCity build on Git push by using a specific command in your Git commit message.
Do you prefer a tutorial video? Watch how to create an automation rule for triggering a TeamCity build!
Extending Automation for Jira with DevOps triggers
The below DevOps automation solution is based on Automation for Jira (Data Center) and the free Better DevOps Automation for Jira app to automate a TeamCity build.
Better DevOps Automation for Jira extends Automation for Jira with DevOps triggers that you can use in any no-code, low-code automation rule in Jira.
You can freely combine the DevOps automation triggers by Better DevOps Automation with the built-in Automation for Jira actions, and implement a wide range of custom DevOps workflows. If you are new to Better DevOps Automation, don't skip the introductory blog on this DevOps automation solution for Jira Data Center.
Trigger a TeamCity build on Git push
This Jira automation rule for TeamCity will trigger on Git push if your developers used the @build command in the Git commit message. They can control if a TeamCity build should trigger after every successful push of code changes.
Better DevOps Automation introduces so-called Genius Commits, which are commits containing custom commands in the commit message. This gives them a seamless way to change the @build command to something else, and control other CI/CD actions without switching context.
Steps to trigger TeamCity on Git push:
-
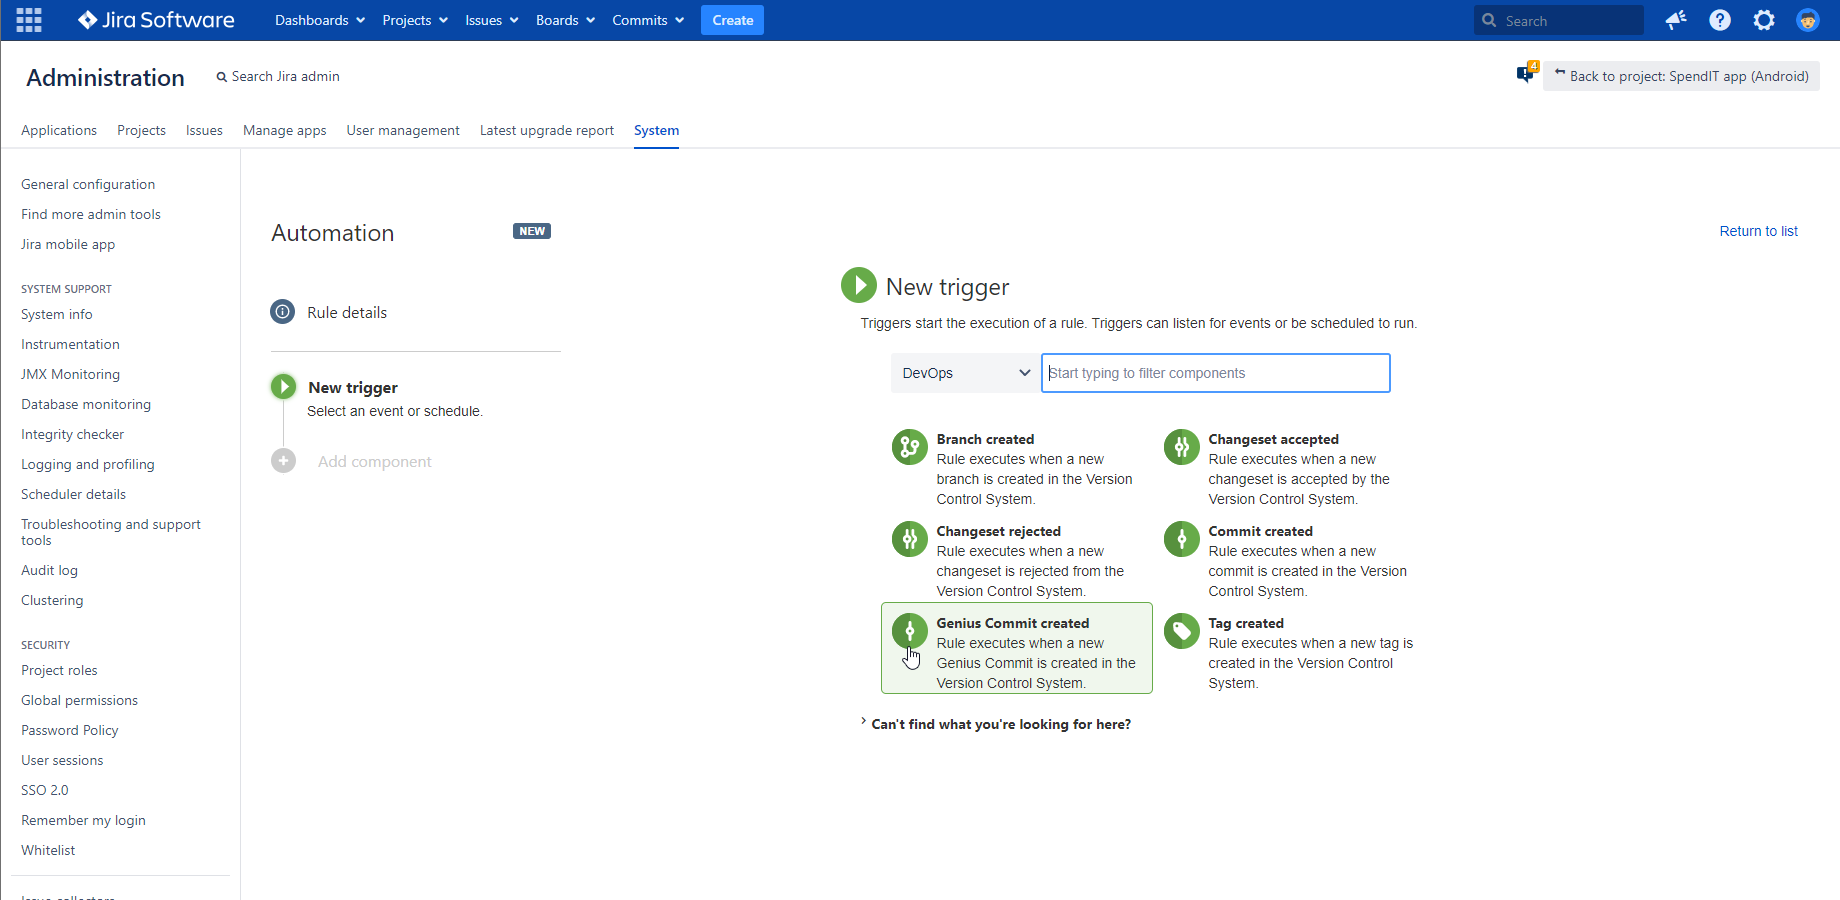
Create a new Automation for Jira rule and choose the Genius Commit created trigger from the DevOps category!
-
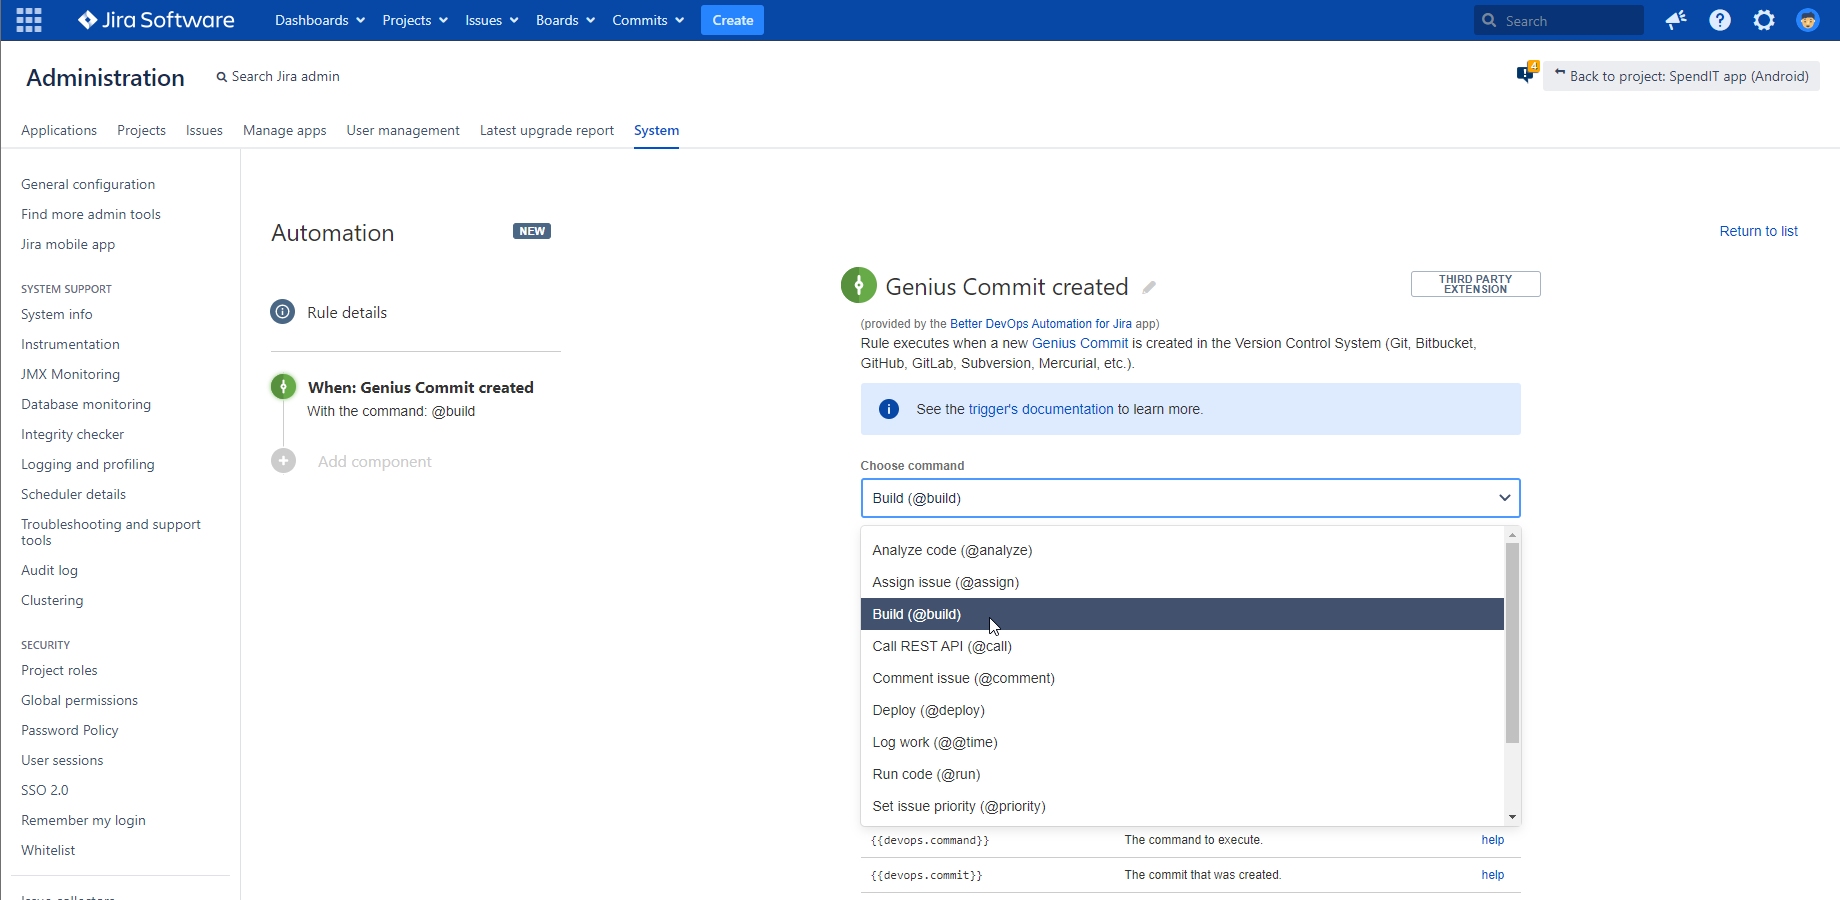
Choose the command "Build (@build)" from the list of commands!
-
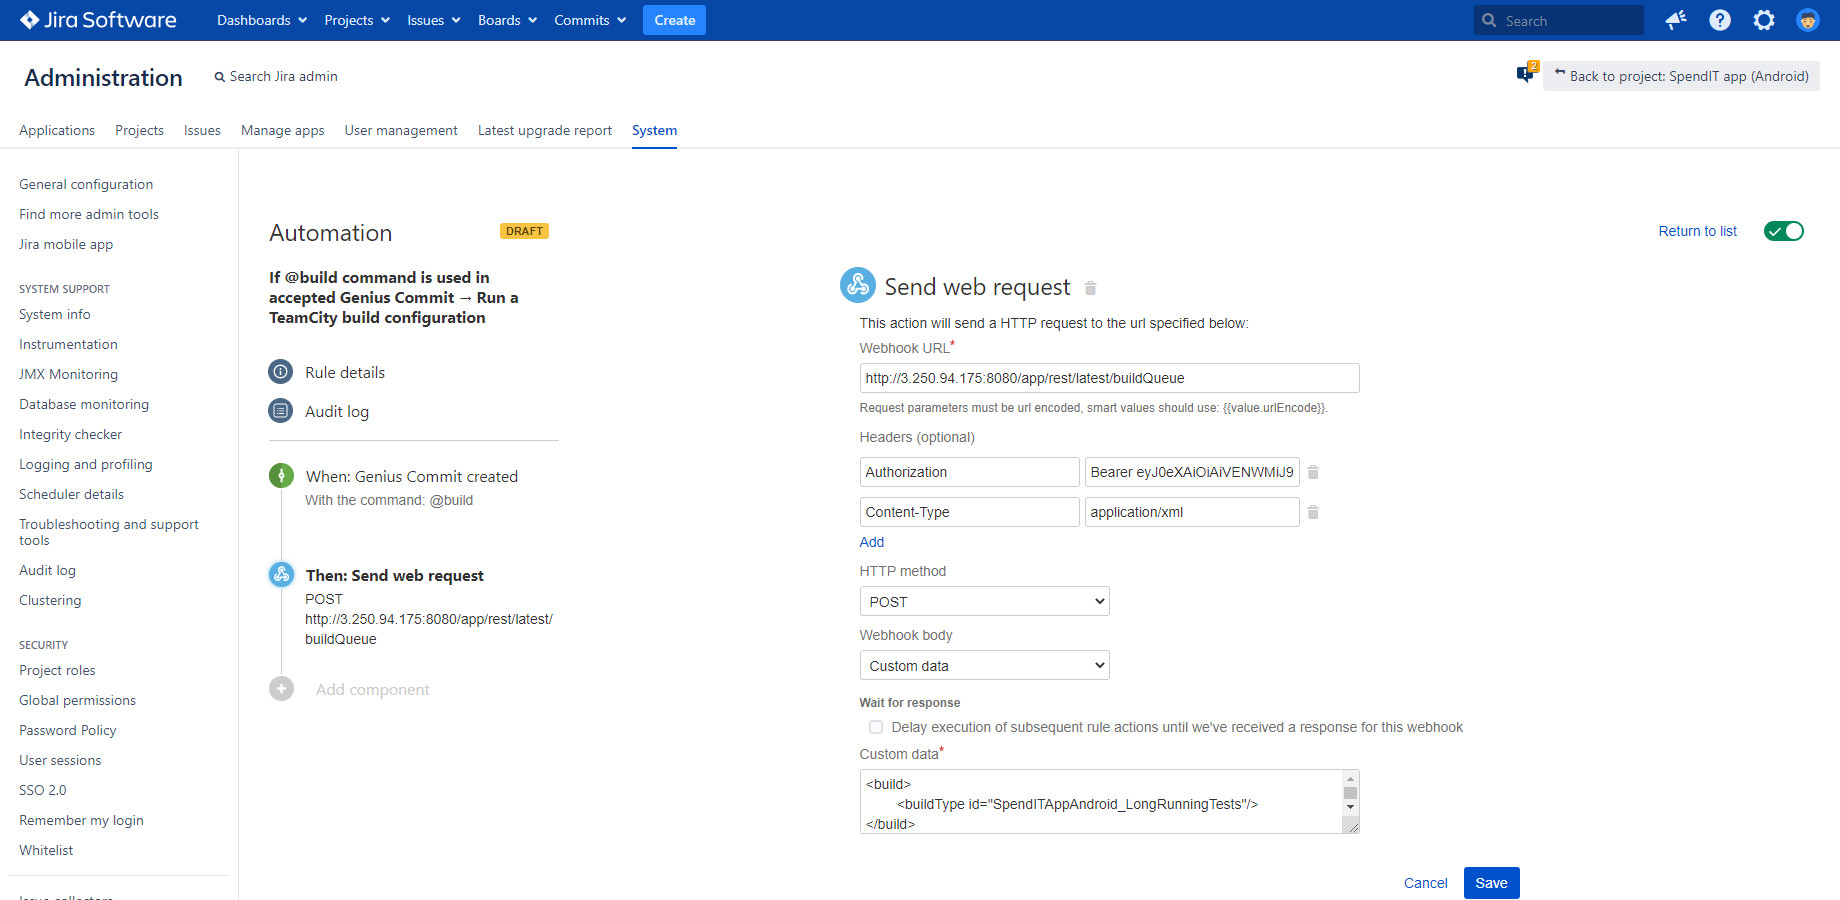
Select the Send web request automation action!
Supply your Webhook URL for TeamCity:
<YOUR_TEAMCITY_SERVER_BASE_URL>/app/rest/latest/buildQueueReplace the placeholders with your actual TeamCity base URL. If you are using a modern version of TeamCity which supports CSRF protection, check the documentation for further instructions.
-
Add a header with the name "Authorization" and with the value of "Bearer <YOUR_TEAMCITY_ACCESS_TOKEN>". Replace the placeholder with the actual TeamCity Access Token. (Watch the tutorial video above if unsure how to create an access token!)
-
Add a header with the name "Content-Type" and with the value "application/xml".
-
Leave the HTTP method selector on POST!
-
For Webhook body, choose Custom data and enter the following:
<build> <buildType id="BUILD_CONFIGURATION_ID"/> </build>Replace the actual value of your TeamCity build configuration ID, located at your build settings in TeamCity.
-
Save and turn on your automation rule!
You can control more than one build configuration in TeamCity with commands! Read further on how to define the TeamCity build configuration in the commit message.
Give this TeamCity Jira DevOps integration a try for free now!
