
In this page
Administrator guide
Step 1: Connect your Bitbucket workspace to your Jira site
Step 2: Enable custom merge checks for the workspace
Step 3: Add the merge check to a repository
Step 4: Add the commit policy to the repository
Step 5: Add the pre-commit check hook script to the repository
User guide
Step 1: Enable the pre-commit check
Step 2: View the merge check
Step 3: Resolve violations
Get started with commit policies
This page has two main sections:
- The Administrator guide covers the essential setup steps an admin needs to complete before users can start using the app.
- The User guide provides developers with simple, step-by-step instructions on the app's key features.
Take a few minutes to go through these guides, they'll help you get up and running smoothly!
💡 Tip: the app offers a built-in onboarding experience that implements this guide in an interactive, guided way. Click the Get started button on the Commit Policy screen to start it. It covers both guides, except for step 1 of the Administrator guide (which is a one-time setup step).
Administrator guide
Don't worry if this guide looks long or complicated - it's absolutely not! Most of these steps only need to be done once, usually when you're just getting started.
Note: different steps may require different permissions, which will be clearly indicated.
Step 1: Connect your Bitbucket workspace to your Jira site
(estimate: 2 min, requires Bitbucket administrator and Jira administrator permissions)
The VCS connection (a secure connection between Jira and your Version Control System) only needs to be set up once when you're getting started. You'll only need to do it again if you add another Jira site later on.
Steps:
- Go to your Bitbucket workspace.
- Install the Better Commit Policy Connector for Bitbucket app to the Bitbucket workspace (if it is not already).
- Go to your Jira site.
- Install the Better Commit Policy for Jira app to the Jira site (if it is not already).
- On the Jira interface, go to Apps (in the left-bar) → Better Commit Policy.
- Click Connect a VCS workspace now (on the top).
-
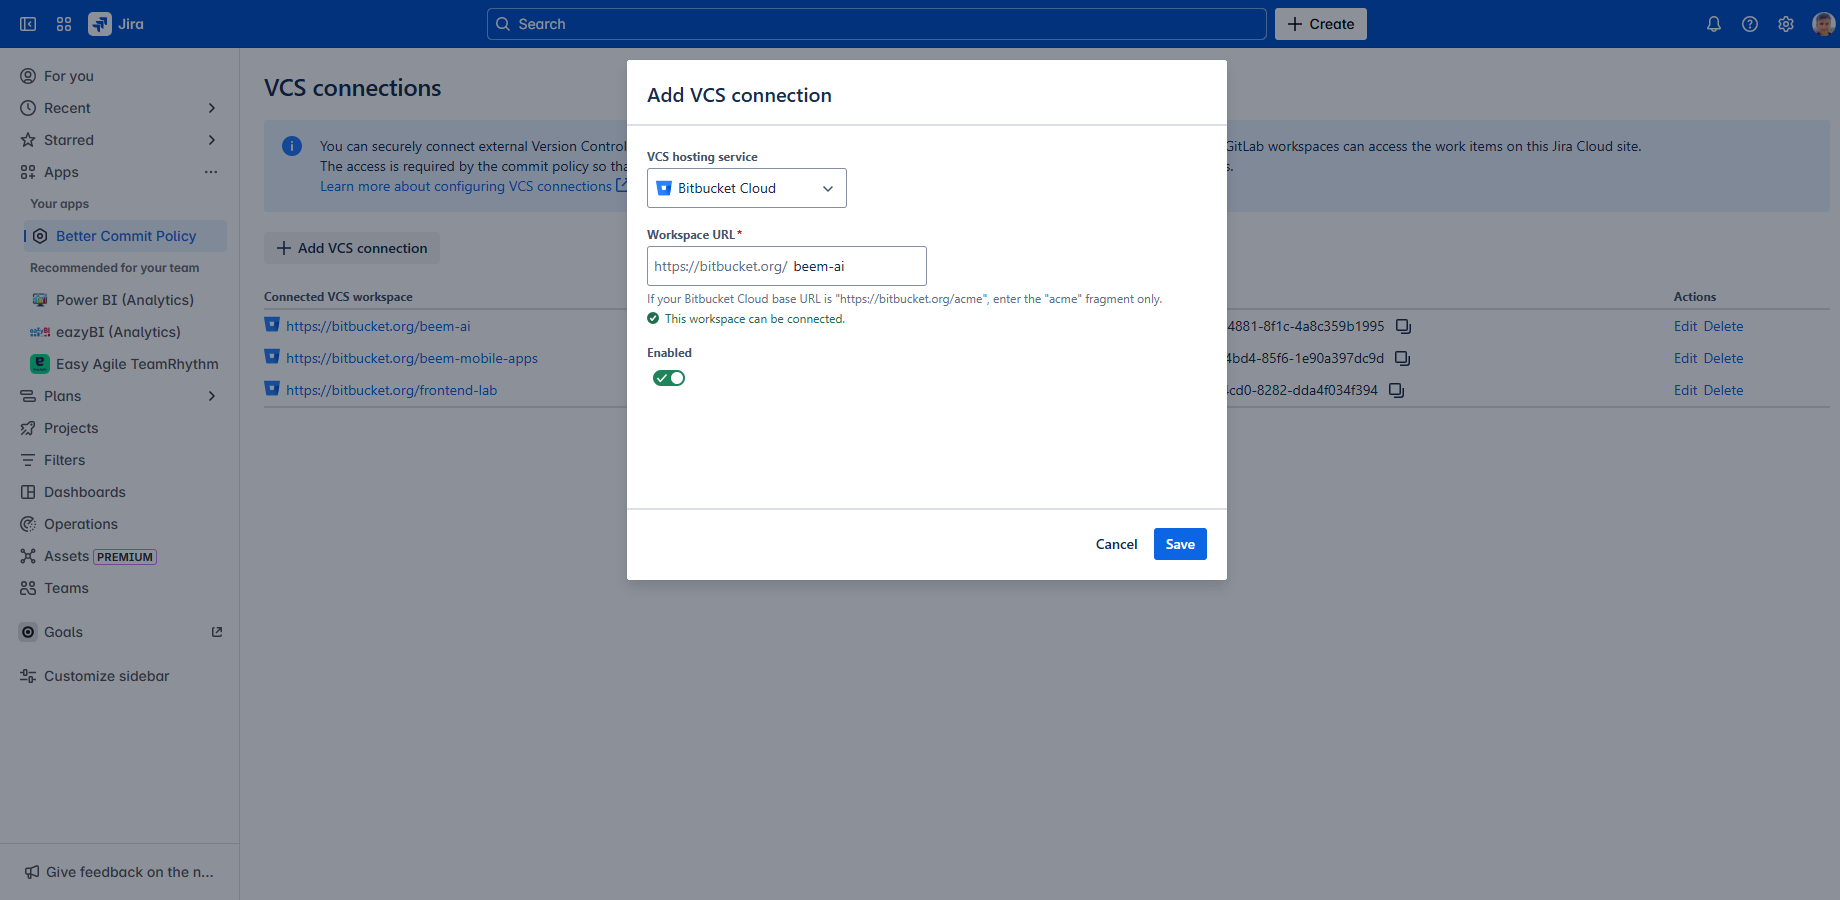
Create the VCS connection:
- Click Add VCS connection.
- Select Bitbucket as VCS hosting service.
- Enter your Bitbucket workspace URL.
- Click Save.
- Click the workspace URL in the table. (Bitbucket opens in a new browser tab, but keep Jira open, as well.)
- The VCS connection is successfully created! ✅
Step 2: Enable custom merge checks for the workspace
(estimate: 30 sec, requires Bitbucket administrator permission)
A Bitbucket admin must enable custom merge checks for the entire workspace. Note that if there is at least one repository in the workspace using custom merge checks, you can safely skip this step, as it's already done.
Steps:
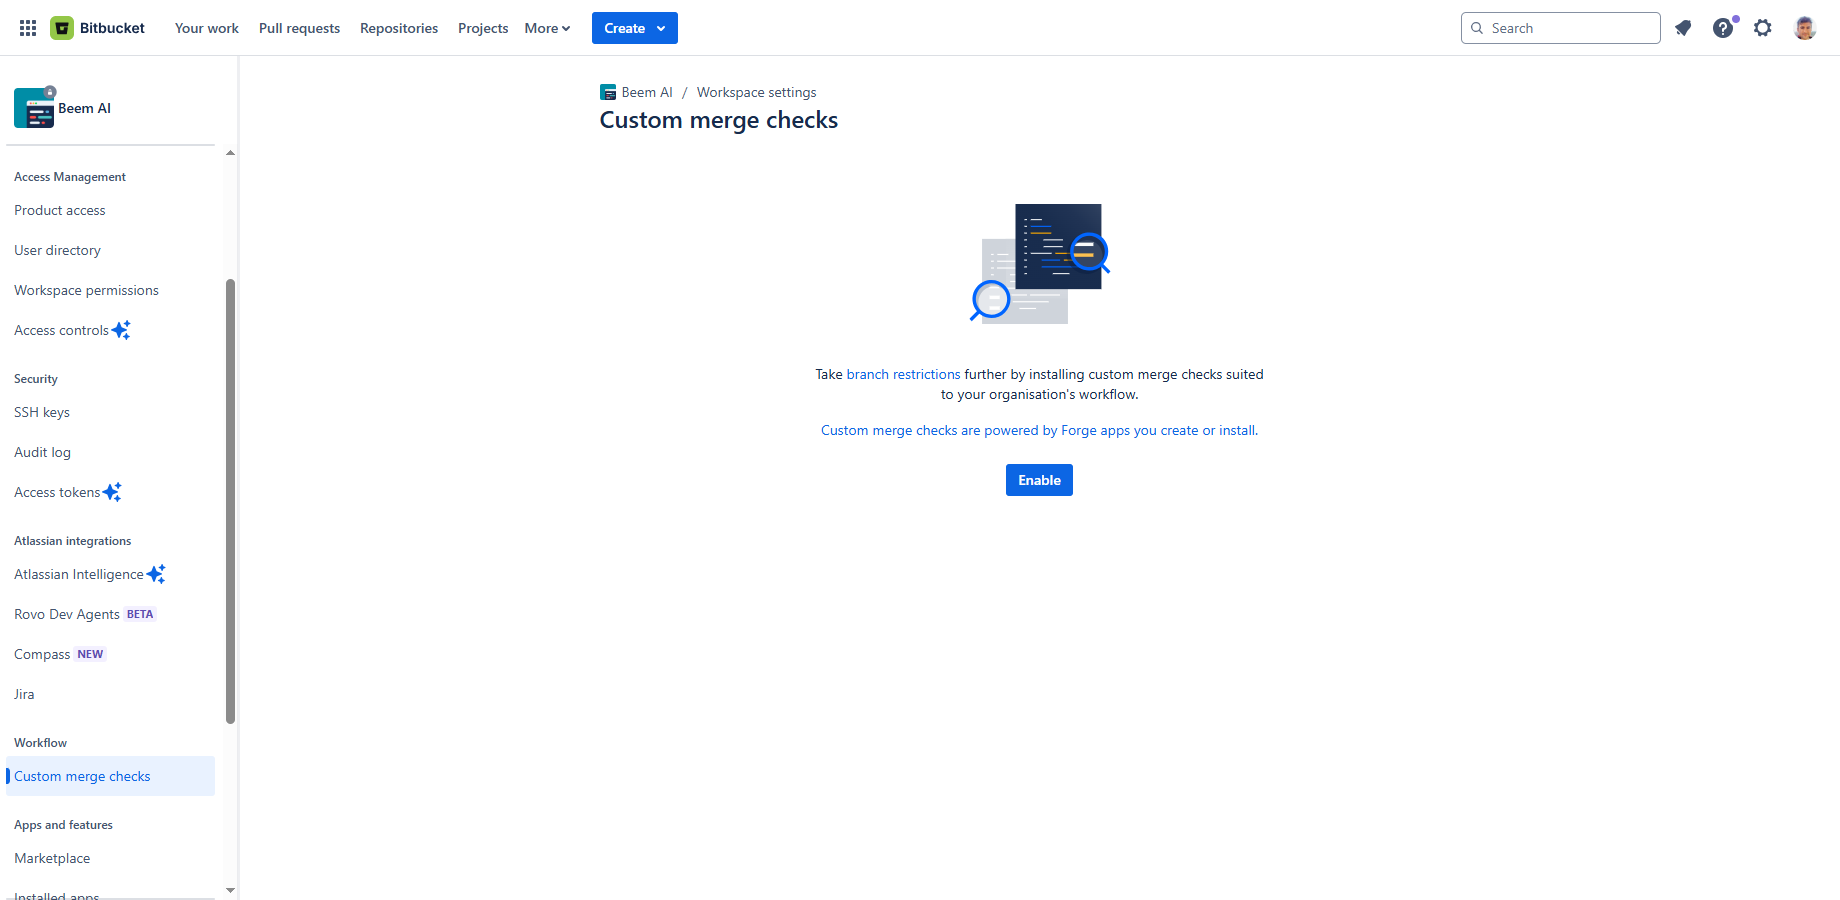
- Click the browser tab that shows your Bitbucket workspace.
- Go to Workspace settings (cog icon "⚙" in the top right) → Custom merge checks.
- Click Enable. (If you can't see the button, it is already enabled.)
- Custom merge checks are enabled! ✅
Step 3: Add the merge check to a repository
(estimate: 30 sec, requires repository administrator permission)
A repository admin must enable the custom merge check in a specific repository to check if pull requests targeted to that repository comply with the commit policy.
Steps:
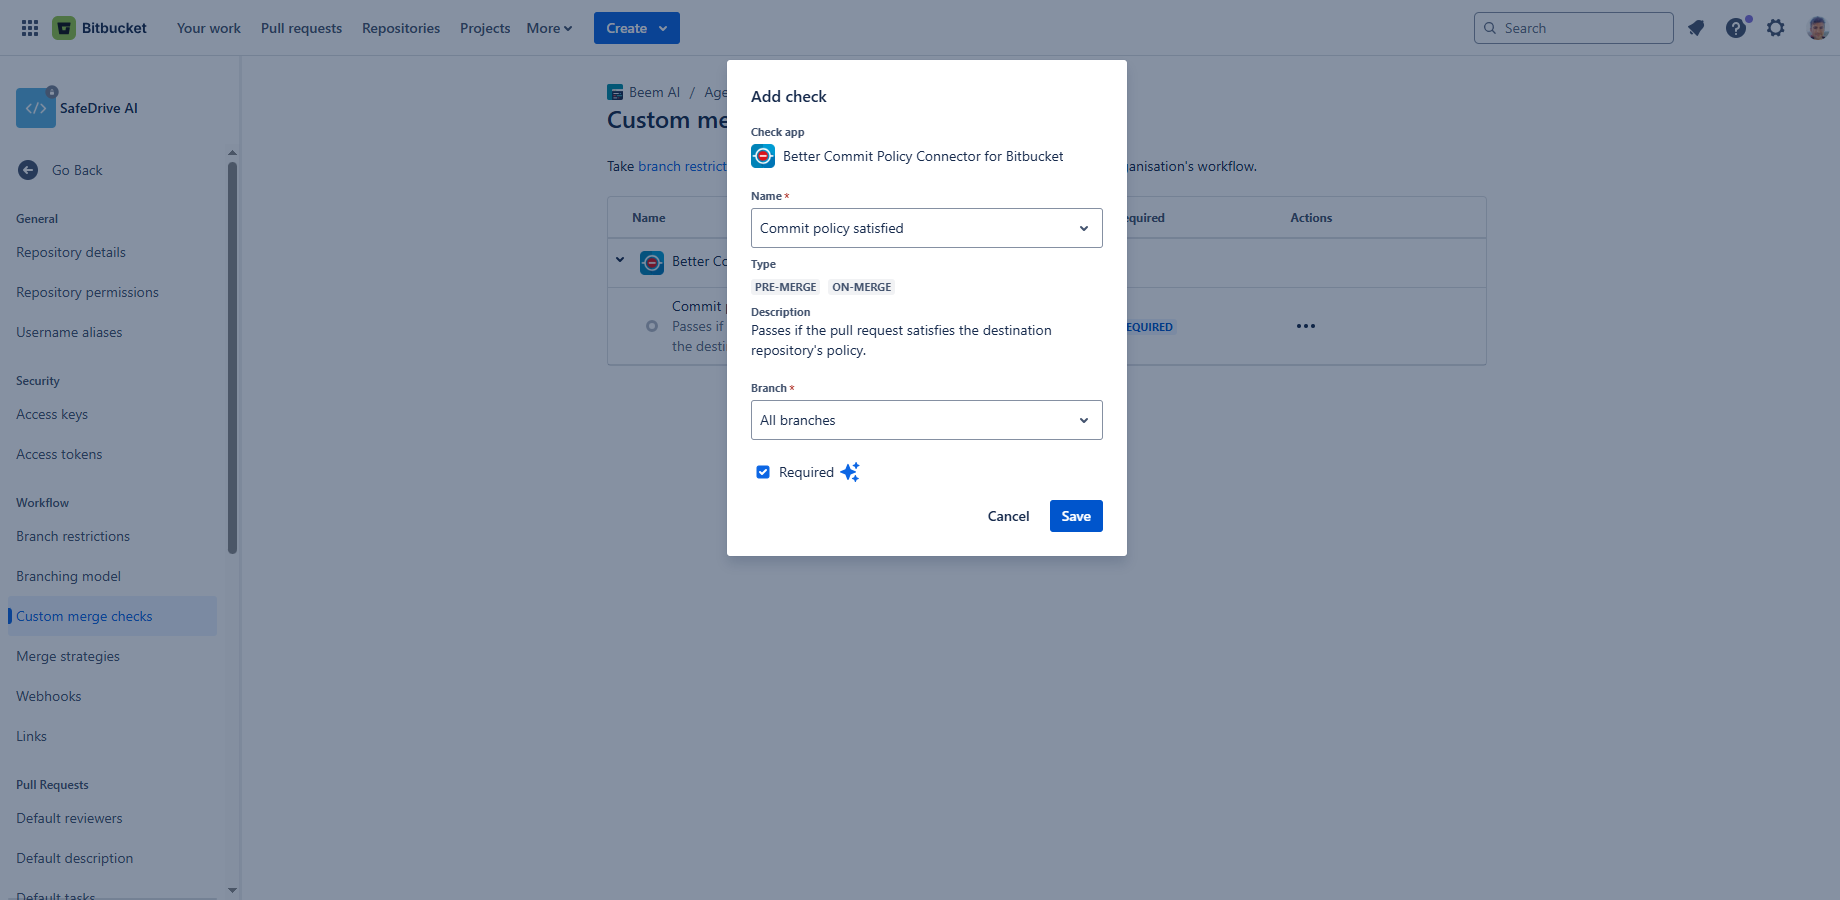
- Go to the repository → Repository settings (cog icon "⚙" in the left-bar) → Custom merge checks.
- Click Add check at "Better Commit Policy Connector for Bitbucket".
- Select the "Commit policy satisfied" check.
- Select "All branches".
- Check "Required". (It is a Bitbucket Premium-only feature. On other plans, skip it.)
- Save it.
- Merge check is now added! ✅
Step 4: Add the commit policy to the repository
(estimate: 3 min, requires repository write permission)
You're about to add a starter policy that ensures each commit message and pull request title includes a valid Jira work item key, and that pull request descriptions aren't left empty. This helps keep every change clearly linked to its Jira work item.
Steps:
-
Find your VCS connection ID (you'll need this later):
- Go back to your Jira site (should still be open in another tab).
- On the Jira interface, go to Apps (in the left-bar) → Better Commit Policy.
- In the Connected VCS workspaces box, find your Bitbucket workspace.
- Click the icon to copy the connection ID to the clipboard.
- Close the tab.
- In the Bitbucket repository, click Apps → Commit policy.
- Select the branch on the top which you want to add the commit policy configuration file to. (Typically the main branch, or another actively used branch that everyone frequently syncs with.)
- Click the yellow Settings button on top right.
- Click Add next to the .commitpolicy.yml resource. (The button is enabled only if the configuration file is missing.)
- Confirm it by clicking Add.
-
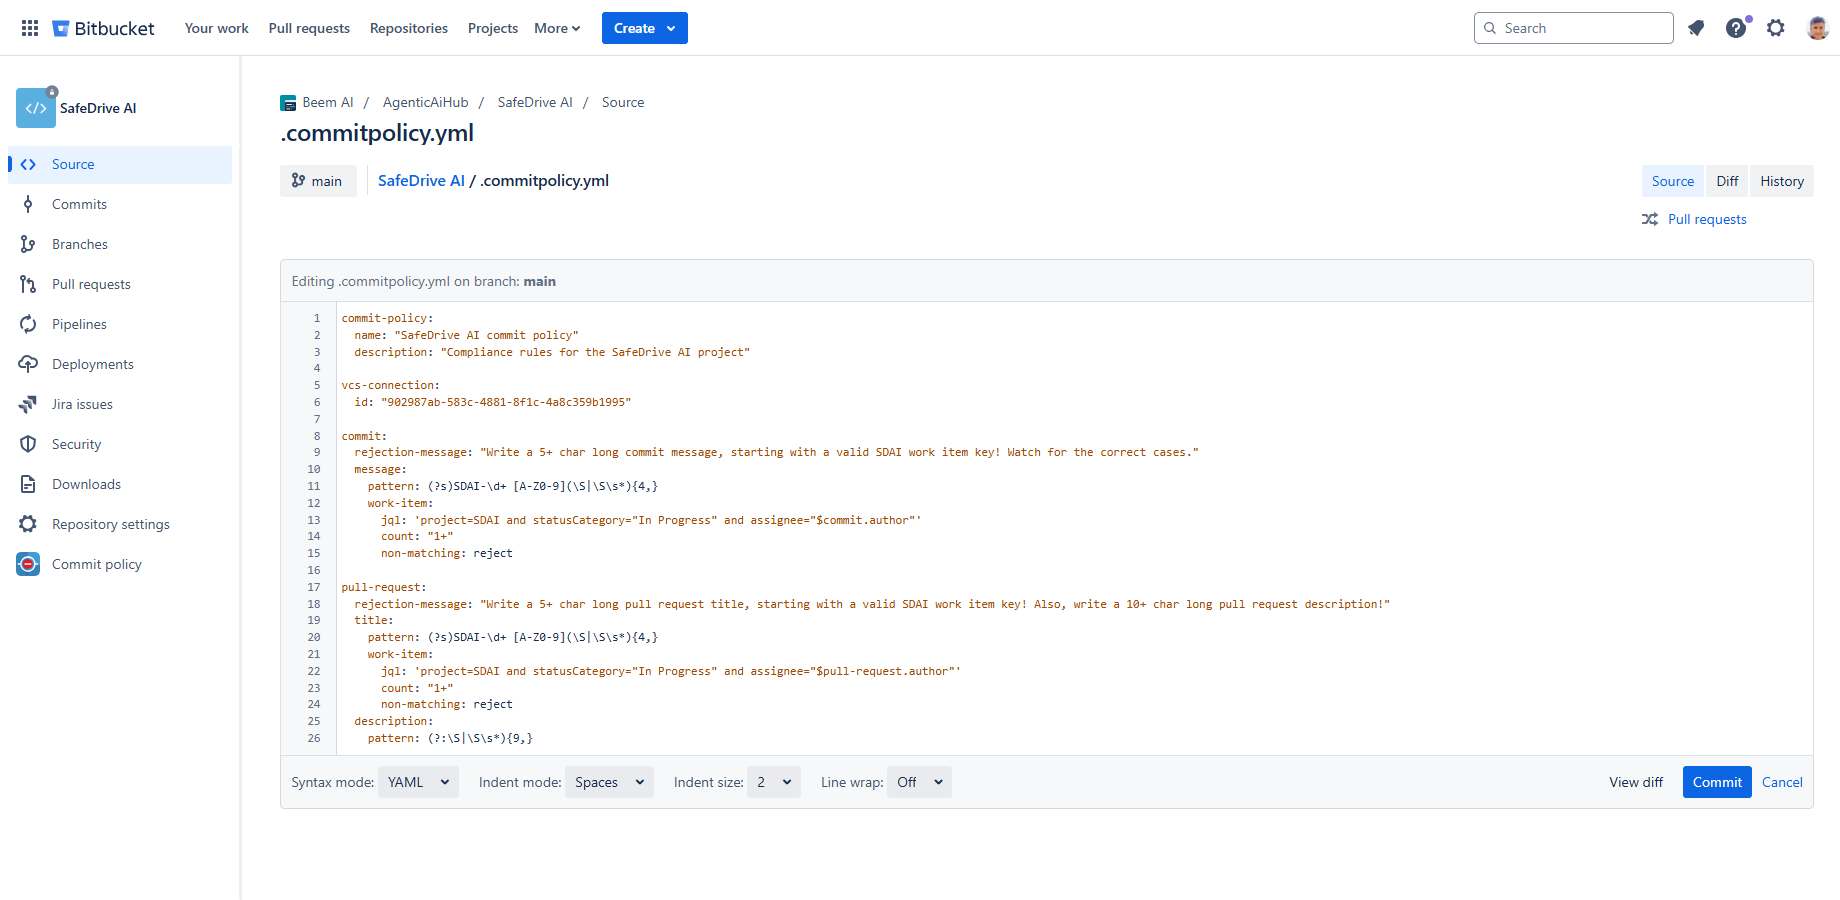
Click View next to .commitpolicy.yml to open it in a new browser tab:
- Click Edit.
- At line 6, replace "<connection-id>" with the VCS connection ID you just copied to your clipboard. (Be sure to preserve the double quotes!)
- Commit it.
- Close the tab.
- Close the Commit policy settings dialog.
- The Commit policy screen will reload and display the parameters. (In case of validation errors, see the troubleshooting guide).
- The initial commit policy is successfully added! ✅
Step 5: Add the pre-commit check hook script to the repository
(estimate: 30 sec, requires repository write permission)
Pre-commit checks require adding a dedicated hook script to the repository. Once it's committed, every developer who syncs with the repository will have it available automatically — no manual distribution needed.
Steps:
- In the Bitbucket repository, click Apps → Commit policy.
- Select the same branch that you selected in step 4.
- Click the yellow Settings button on top right.
- Click Add next to the commit-msg hook script resource. (The button is enabled only if the script is missing.)
- Confirm it by clicking Add.
- Close the Commit policy settings dialog.
- The repository is ready for pre-commit checks! ✅
🎉 The app is ready to use! Follow the User guide to get familiar with the features.
User guide
Once an administrator has completed the Administrator guide, you can follow the steps below to get familiar with the app's features.
Step 1: Enable the pre-commit check
Pre-commit checks allow you to verify your commits on your local machine before they are created. This way, you can catch and fix problems immediately rather than at push or review time.
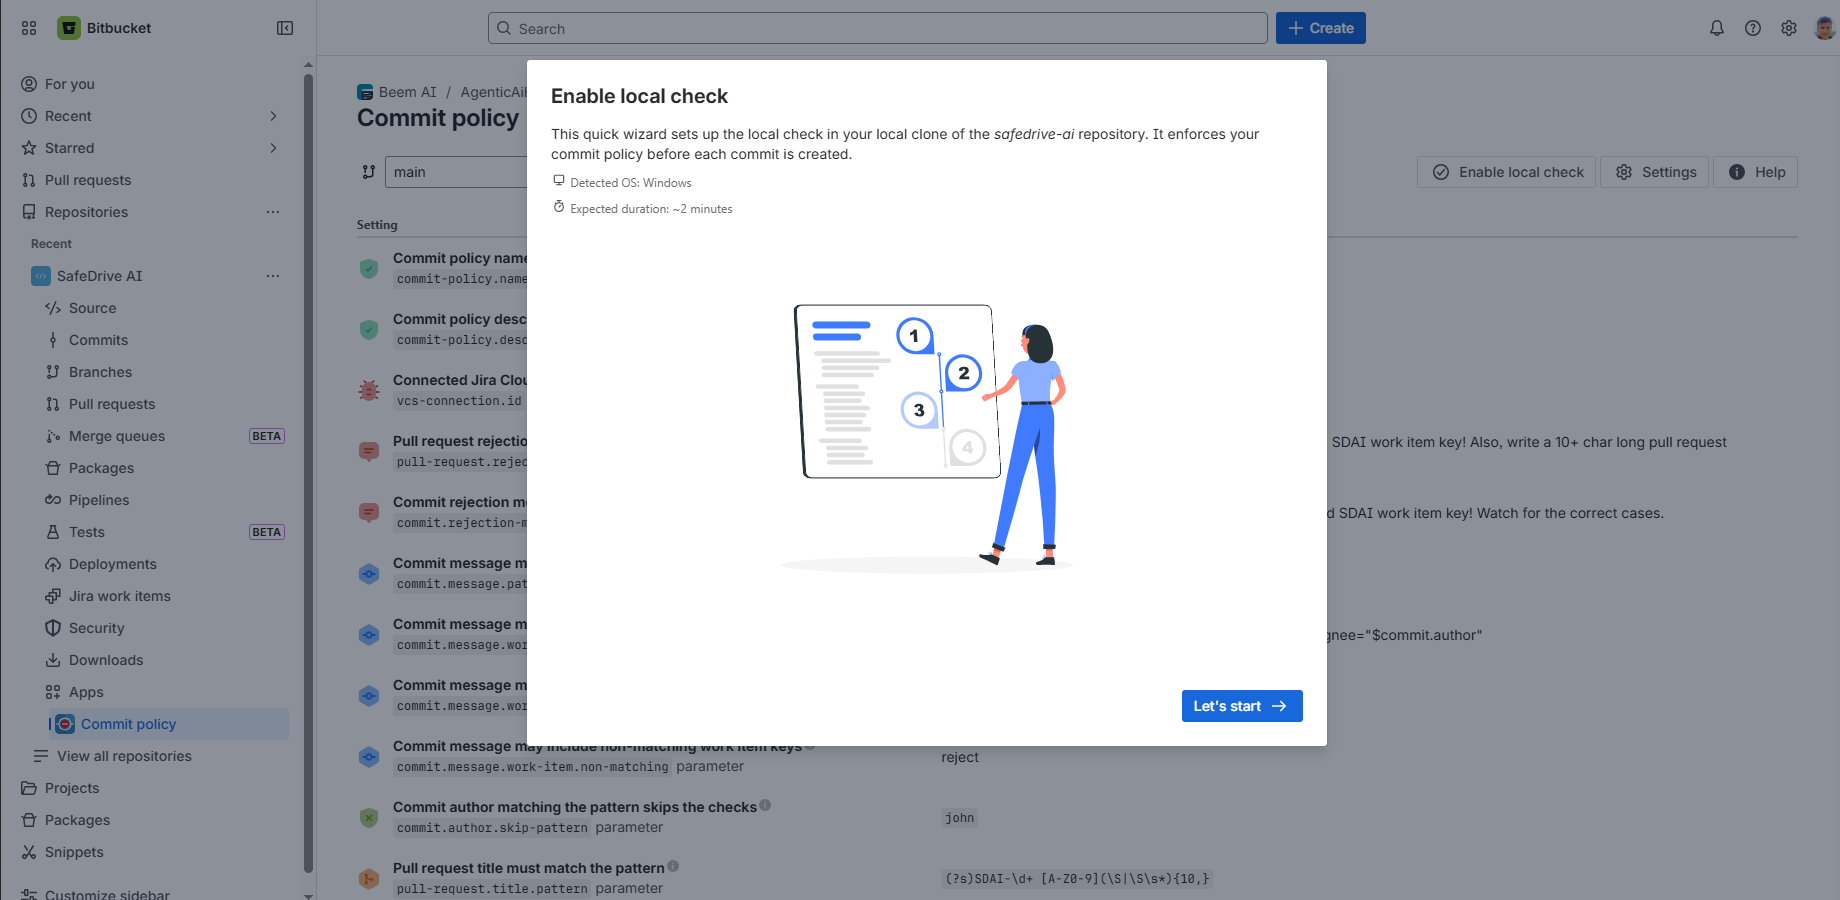
Steps:
- Go to the repository in Bitbucket Cloud, click Apps → Commit policy.
- Click Enable pre-commit check and follow the wizard steps.
- Don't forget to execute the test steps instructed by the wizard.
- The pre-commit check is working! ✅
Step 2: View the merge check
Merge checks make sure pull requests follow the commit policy. You can view the results right on the pull request screen.
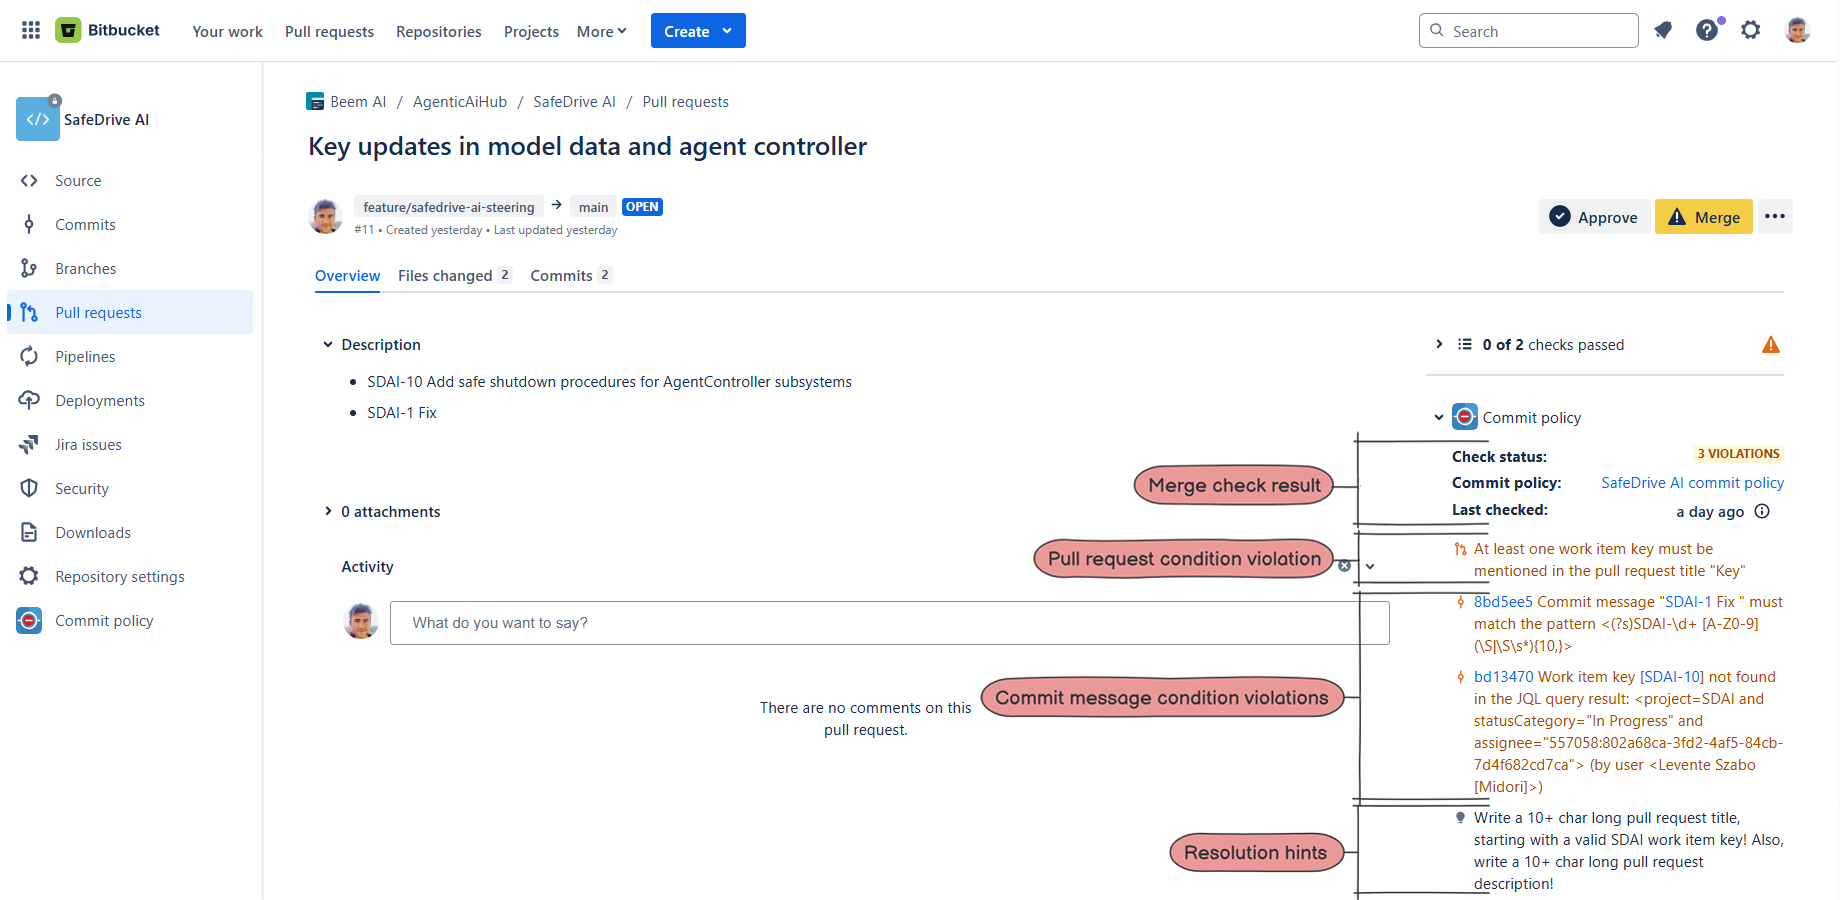
Steps:
- Go to the repository in Bitbucket Cloud.
- Go to Pull requests, and click any open pull request.
- Look at the Commit policy section in the right-bar.
- If the pull request meets all the commit policy requirements, you'll see "Satisfied". Otherwise, it will show "N violations".
- The merge check definitely works! ✅
Step 3: Resolve violations
To learn how to resolve violations, start by finding a pull request that shows "N violations". We'll use it as our example.
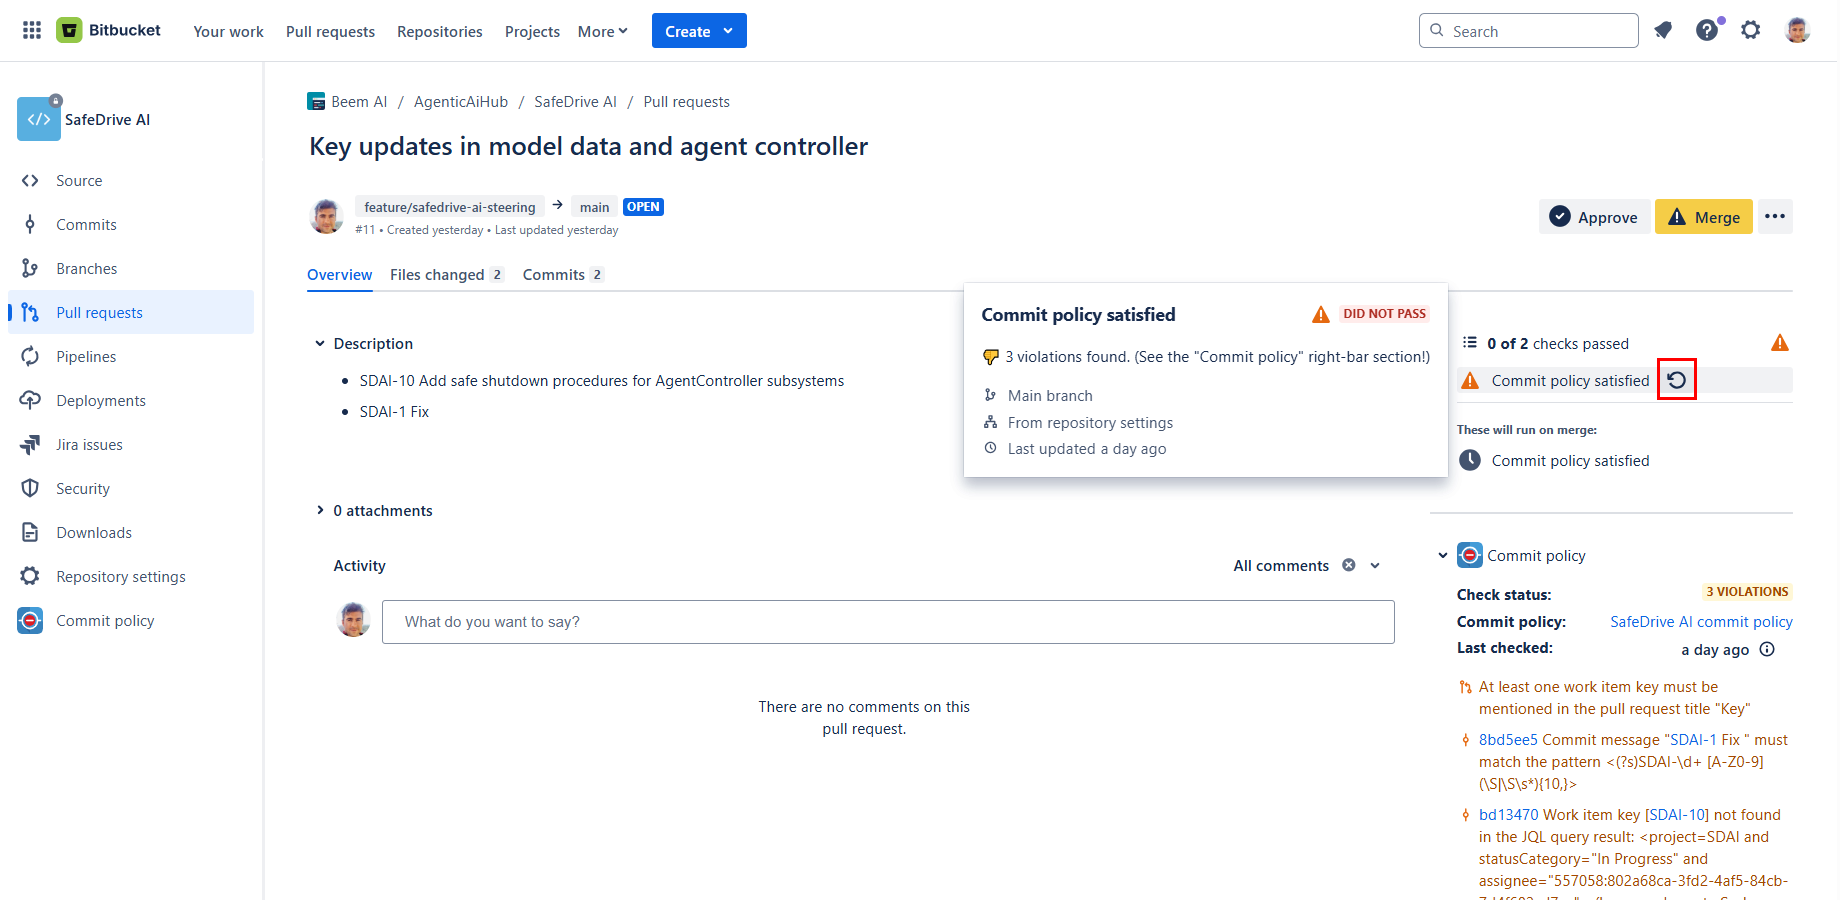
Steps:
- View the violation list in the Commit policy section in the right-bar.
-
For each violation:
-
Make the change needed to resolve it:
- The pull request title is missing the work item key? → Make sure to add one!
- The pull request description is empty? → Write it!
- The work item is not assigned to you? → Update the work item (or choose another)!
- ... and so on.
-
Re-run the merge check:
- If the violation was related to a commit → Push the fixed commit to the source branch! The merge check will re-run automatically.
-
If the violation was related to anything else →
Click the icon next to the "Commit policy satisfied" check.
(If the icon isn't available, click the pull request Approve button at the top, then click Unapprove to undo it. This workaround triggers a merge check re-run. It's needed because Bitbucket doesn't always show the icon when expected.)
-
Make the change needed to resolve it:
- Repeat these steps until the check status shows "Satisfied."
- Your pull request is perfect! ✅
🎉 Congratulations! You now know how to use commit policies to keep your pull requests clean, consistent, and high quality.
Questions?
Ask us any time.