
In this page
Why use local checks?
How to use local checks?
Local check in action
Activate the local check
Add the required resource files
Enable the local check
Skip the local check
Skip the local check for a single commit
Disable the local check
Bypass the local check and all commit hooks
Local check security
Configuration
Work with Git configuration settings
Configure encoding
Configure a chained commit-msg hook
Custom filename
Behavior on rejection
Troubleshooting
Integrity test
Verbose mode
What is a local check?
Local checks allow developers to verify changes on their local machine, ensuring code quality and adherence to team standards before the commit is created. This early verification helps prevent problems later in the development process, making the team faster and more productive. The earlier you catch a problem, the less time and effort it takes to fix it!
To get a grasp of how local checks work, watch this video:
✨ Better Commit Policy Connector is the only commit checker app for Bitbucket that supports local checks and allows working fast while enforcing a policy!
Why use local checks?
Local checks are an additional layer of verification. They do not replace push checks or merge checks. Those remain the primary enforcement mechanism. Local checks catch violations early, when fixing them is trivial.
Every policy violation has a cost that grows the later it is discovered:
- Before commit: almost nothing, just rewrite the commit message or adjust the files and try again.
- At push time: the commit already exists and must be amended or dropped.
- At merge time: may block an entire pull request and require coordination with reviewers.
How to use local checks?
Local checks are powered by a standard Git hook. Specifically, a commit-msg hook script is checked into the repository alongside your code. Because it lives in the repository, it is automatically available to everyone who clones or pulls. No manual distribution or installation is needed.
The following sequence diagram illustrates what happens when you try to create a commit in a repository that has local checks enabled:

Here is each step in detail:
- You "git commit".
- Git automatically executes the commit-msg hook script.
-
The script calls the cloud-hosted check service.
- The REST API call carries the relevant commit details (such as author, changed files, commit message, etc.).
- It is secured using the check token.
- The service evaluates the received commit against the commit policy.
- The service returns the check result (which includes the check status and the list of violations) to the hook script.
-
Based on the result, the script:
- If the check status is Satisfied, Git creates the commit successfully and displays a short confirmation message.
- If the check status is N violations, Git rejects the commit and displays the violations. Your changes remain staged and uncommitted. Fix the reported violations (e.g. rewrite the commit message) and try again — this restarts the sequence from step 1.
Local check in action
The local check runs entirely behind the scenes, so as a developer, you don't have to think about any of it. Here is what the console output looks like in practice:

The developer's first commit is rejected because the commit message does not include a work item key and is too short. After fixing both problems, the second commit is accepted.
Local checks work with any standard Git client — not just the CLI, but also GUI clients and IDE plugins! The experience will be very similar across all of them, though each client may present the output in its own way.
Activate the local check
To activate local checks in a Bitbucket repository:
- Add the required resource files to the repository.
- Enable the local check on each developer's machine.
Once these are completed, the local check will automatically run on every new commit created in that developer's local clone.
Add the required resource files
Local checks require the commit policy resource files to be present in the repository. Someone with "write" permission can easily add them using the Commit policy settings popup.
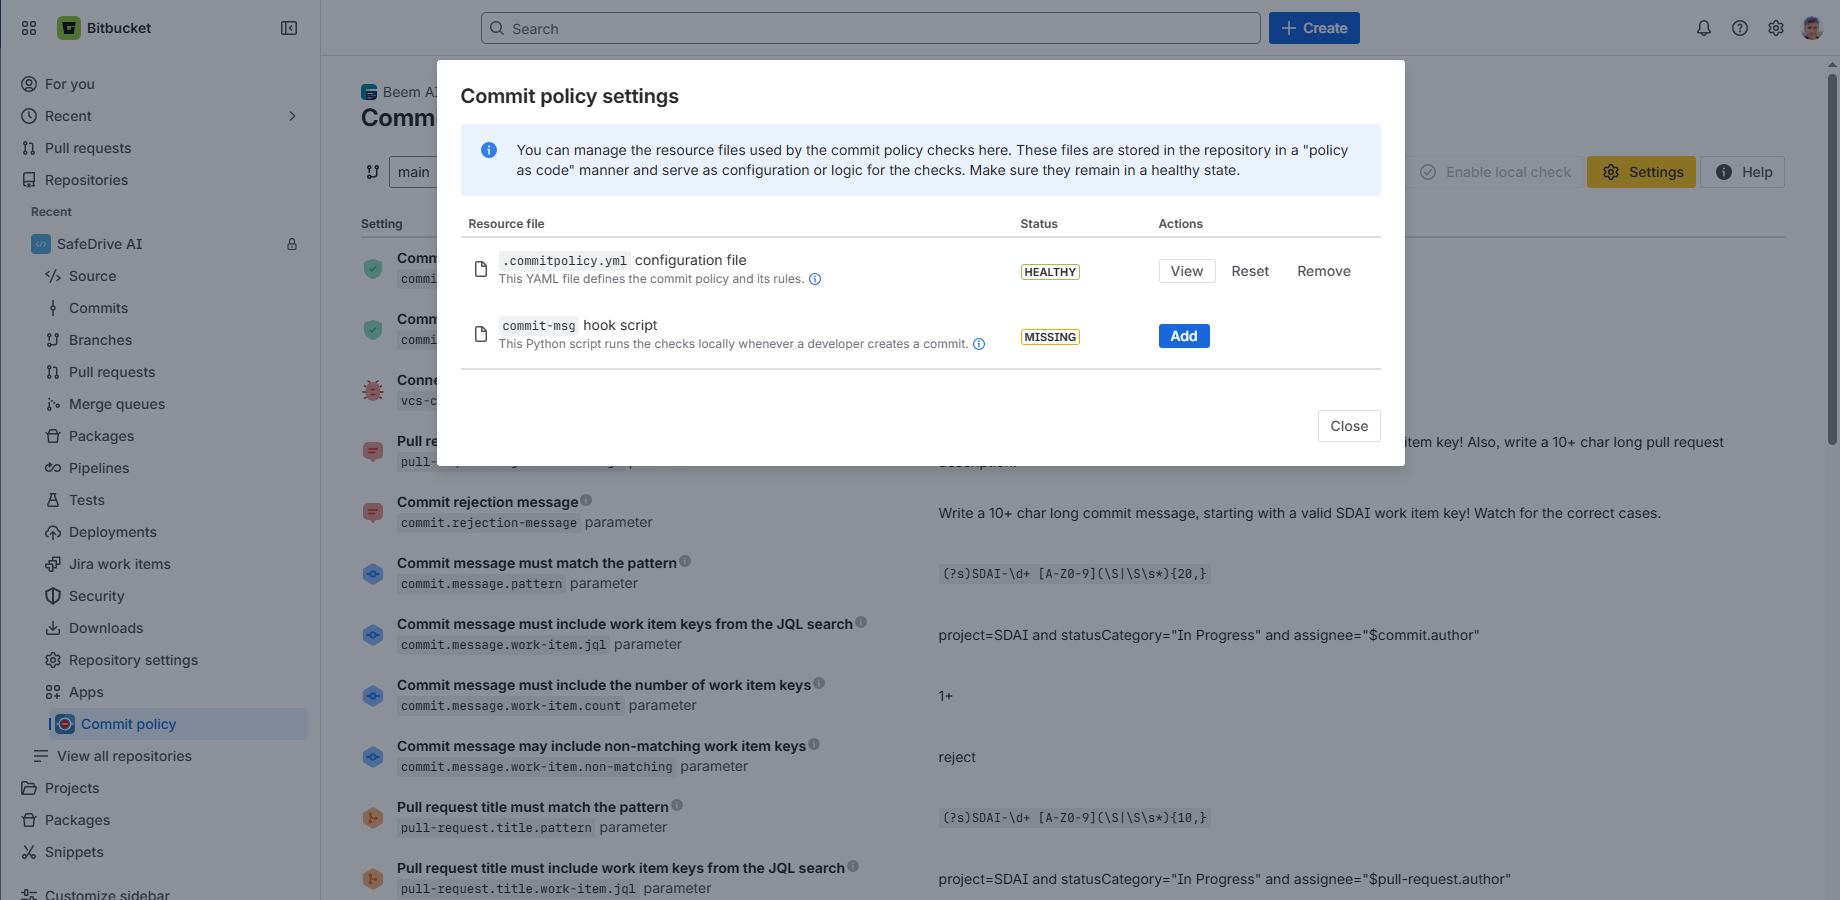
Steps:
- Go to the repository in Bitbucket, click Apps (left-bar) → Commit policy.
- Click the Settings button on the top.
- Click Add next to the missing file(s).
- Make sure that both files are healthy.
This only needs to be done once per repository and takes just a minute.
Enable the local check
Local checks are opt-in. To help with enabling them, the app offers a convenient, step-by-step setup wizard.
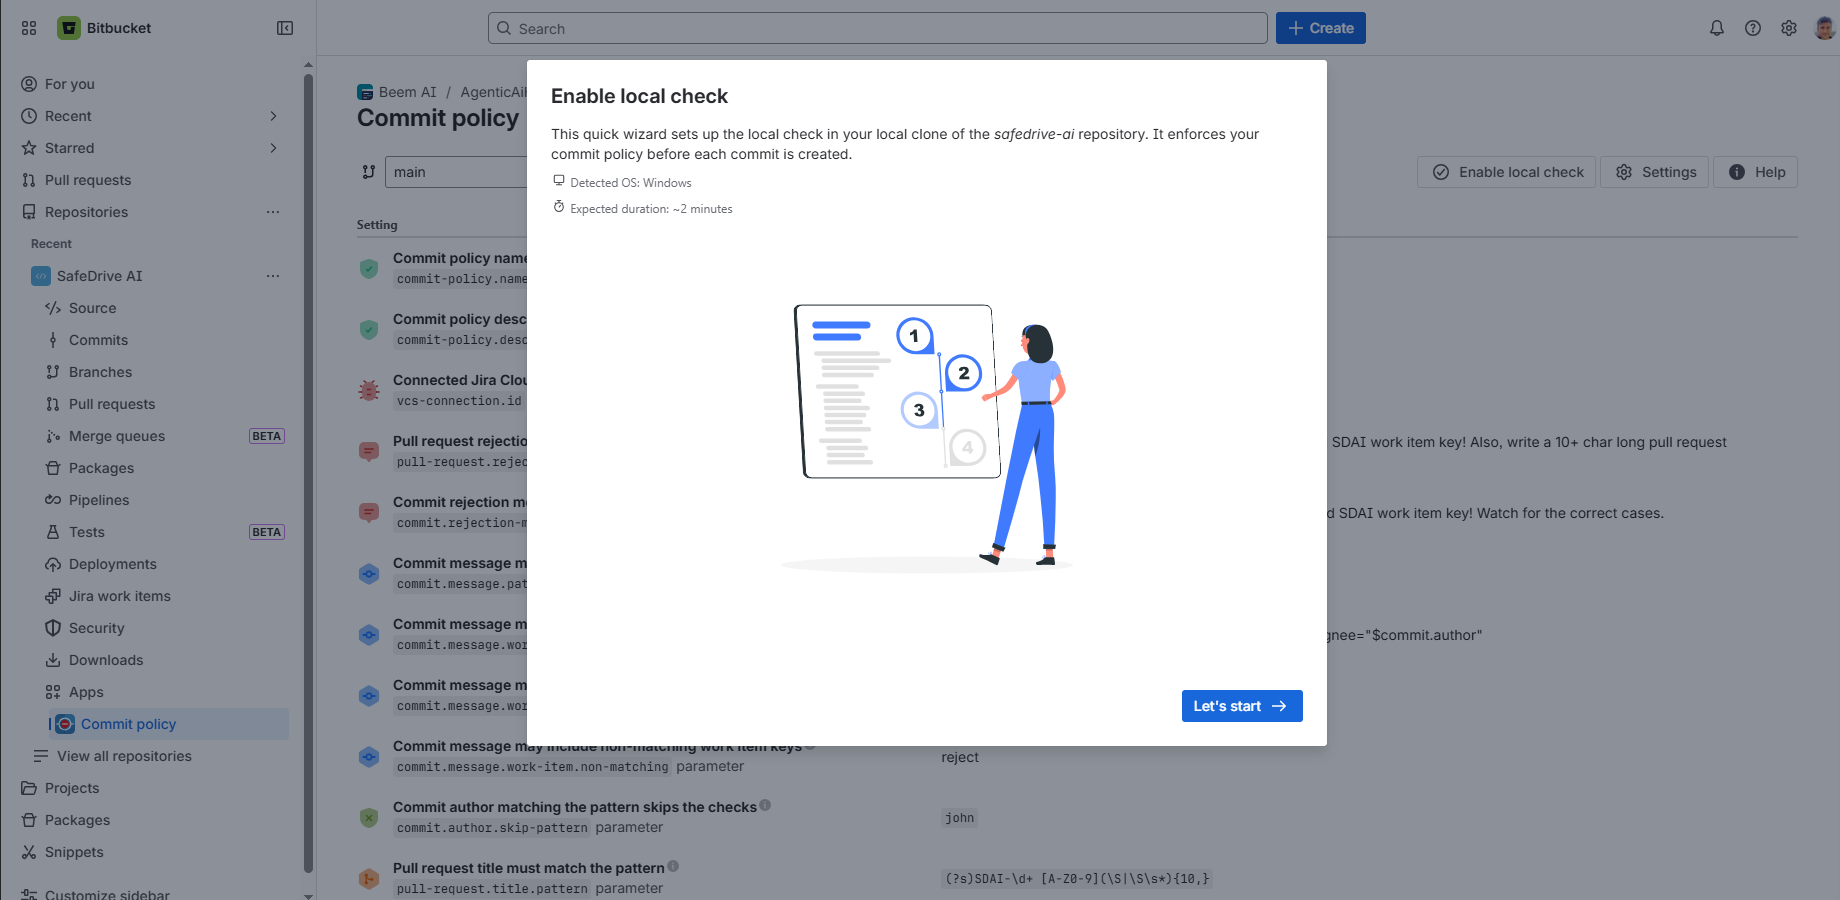
Steps:
- Go to the repository in Bitbucket, click Apps (left-bar) → Commit policy.
- Click the Enable local check button on the top.
- Follow the steps in the wizard.
- Don't forget to run the integrity test as instructed by the wizard.
This must be done separately in each local clone, but only takes a minute.
Skip the local check
There are situations where a developer may need to skip local checks. Common examples are working offline (local checks require an internet connection) or dealing with a temporary technical problem on the server side. The app offers multiple ways to skip local checks, each with different scope and convenience.
Skip the local check for a single commit
To skip the local check for a single commit, include the text that matches the customizable commit skip pattern in the commit message. By default, it is #skipcheck:
git commit -m "Fix a typo #skipcheck"
Use this for a quick, one-time skip.
Disable the local check
If you need to temporarily disable the local check, set the midori.check.skip Git configuration setting to true:
git config midori.check.skip true              # disable for this repository only
git config --unset midori.check.skip           # re-enable

git config --global midori.check.skip true     # disable for all repositories
git config --global --unset midori.check.skip  # re-enable
Use this when you need to work offline for an extended period, as it stays in effect until you unset it.
Note that if you have a chained hook script configured, it will still run as normal.
Bypass the local check and all commit hooks
You can bypass all hook scripts entirely using the standard --no-verify Git option:
git commit -m "Fix a typo" --no-verify
Use this only in rare situations when you need a one-time skip for all commit hooks, including the chained hook script.
Local check security
The hook script authenticates to the app's REST API using a secure, encrypted personal check token. It is generated by the Enable local check wizard, which also provides the exact command to store it in your local Git configuration under the midori.check.token key. If the token is corrupt or expired, the check service will return an error the next time the local check runs.
The token identifies you as an Atlassian user. This is used during policy evaluation for checks that depend on your identity, for example to verify that the work item referenced in the commit message is assigned to you as the committer.
The token is both personal and repository-specific, so:
- Do not share it with your team members. Each developer must generate their own.
- Do not copy it from one repository to another. Always generate a fresh token for each repository.
- Do not set it at the global or system scope. Since the check token depends on both the user and the repository, it must always be set at repository scope.
Configuration
The following topics cover less common scenarios and non-standard configurations.
Work with Git configuration settings
All configuration of the local check is done through standard Git configuration settings. You can set or unset them using the Git CLI in your local repository:
git config midori.foo bar      # set
git config --unset midori.foo  # unset
Most GUI clients support working with Git configuration settings as well.
Notes:
- All local check settings are prefixed with midori. to keep them in a dedicated namespace.
- All settings can be applied at repository level or globally (all local repositories).
- Repository-level settings take precedence over global ones.
Configure encoding
By default, the hook script uses UTF-8 encoding, which works correctly in most environments. If your system uses a different encoding, you can override it using the midori.encoding Git configuration setting:
git config midori.encoding cp1252
After changing the encoding, run the integrity test to confirm the configuration is correct.
Configure a chained commit-msg hook
If you already use a custom commit-msg hook, keep in mind that Git identifies hooks by filename. This means there can only be one commit-msg hook at a time.
When you set up local checks, the local check hook script becomes the commit-msg hook. However, it can be configured to call an additional script. This script is called the chained hook. To continue using your existing hook, configure it as the chained hook.
Here are the steps, with an example chained hook script:
- Set up the local check hook script and make sure it works correctly before proceeding.
- In your local repository, enter the .commitpolicy-hooks directory.
-
Create a file named commit-msg-chained with the following content:
#!/usr/bin/python # coding: utf-8 import sys import subprocess # get the current branch name branch = subprocess.check_output(['git', 'rev-parse', '--abbrev-ref', 'HEAD']).decode().strip() # reject direct commits to protected branches PROTECTED_BRANCHES = ['main', 'master'] if branch in PROTECTED_BRANCHES: print(f"Error: Direct commits to '{branch}' are not allowed.", file=sys.stderr) sys.exit(1) - This is a sample script for a common use case (protecting branches from direct commits). Replace the logic with your own as needed.
-
Make the chained hook script executable (Linux only):
chmod +x .commitpolicy-hooks/commit-msg-chained
- If you want to share the chained hook with the team, add the file to the repository, commit and push it.
- Test the setup: on a protected branch (e.g. main), attempt a commit with a valid commit message. The local check should accept it, but the chained hook should reject the commit.
Custom filename
The default filename for the chained hook script is commit-msg-chained. If you need a different name, you can override it using the midori.chained.hook.filename Git configuration setting. The file must still be placed in the .commitpolicy-hooks directory regardless of the name:
git config midori.chained.hook.filename my-chained-hook
After setting up the chained hook, run the integrity test to confirm that both the local check and the chained hook are working correctly.
Behavior on rejection
By default, the chained hook only runs if the local check accepts the commit. If the local check rejects the commit, the chained hook is skipped to save an additional check on a commit that is already rejected.
To run the chained hook regardless of the local check result, set the midori.chained.hook.runOnRejection Git configuration setting to true:
git config midori.chained.hook.runOnRejection true
Troubleshooting
This section covers troubleshooting topics specific to local checks. For general troubleshooting, see the troubleshooting guide.
Integrity test
The integrity test is a special mode of the hook script that verifies the entire local check setup is configured correctly and working as expected. Instead of checking an actual commit, it runs a series of tests and reports the result of each one:
- Python version: verifies that a supported Python version is available.
- Hook script configuration: validates the hook script's own settings (e.g. the check token).
- Commit policy configuration: validates the .commitpolicy.yml file in the repository.
- Chained hook script: if a chained hook is configured, verifies it is accessible.
- Check service with sample data: sends a test request to the cloud check service and verifies it responds correctly.
- Check service with i18n data: repeats the service test using international characters to verify encoding is handled correctly.
Run the integrity test when you first enable local checks in a repository to confirm everything is set up correctly. It is also a valuable troubleshooting tool when a local check is not behaving as expected: it quickly pinpoints which part of the setup has a problem.
To run the integrity test, execute the hook script directly from the root of your repository, without any arguments:
python3 .commitpolicy-hooks/commit-msg
When all tests pass:

If a problem is detected, it stops immediately, reports the failing test with an error message, and provides a hint on how to resolve it:

Make sure the integrity test passes without any problems before you start using local checks.
Verbose mode
Verbose mode reveals the full interaction between the local check hook script and the check service. Use it when the integrity test alone does not give you enough information to investigate a problem, or when Midori support asks you to attach the output to a support ticket.
Enable it once in your local repository:
git config midori.log.verbose true
From that point on, every commit attempt will produce verbose output. To turn it off again:
git config --unset midori.log.verbose
Questions?
Ask us any time.