
In this page
How to export Jira users to Excel?
Working with Jira users in Excel
Migrating user data to an external application
Finding Jira users not logged in recently
Finding Jira users having difficulties with logging in
Finding Jira users having access to a project
Finding inactive Jira users
Customizing the user export template
Exporting user properties
Automation for Jira user exports
Upgrading from pre-2.0.0 app versions
Exporting Jira user accounts to Excel
Jira's built-in features for user management are fairly limited, which can be frustrating when creating reports on user account data. Typical use cases include doing maintenance on the user accounts, listing the users who didn't log in for a year (and just waste a Jira user account), or double-checking the users in the "developer" role through a list of projects. Reporting can be even more difficult in Jira instances with thousands of user accounts, merged from multiple user directories.
This tutorials explains how to address these type of problems using Better Excel Exporter and Microsoft Excel. We will use a custom template to bring Jira users to Excel with a single click, for data migration, searching, filtering and reporting purposes.
Please note that this is a great example for using Better Excel Exporter to export non-issue-related information from Jira to Excel!
How to export Jira users to Excel?
First, install the Better Excel Exporter app.
Since app version 2.0.0, Better Excel Exporter has a view named "User (Excel)", albeit this is disabled by default. (For earlier versions: follow this upgrade guide.)
In order to activate this feature:
- Login to Jira as admin
- Go to Administration → Add-ons → Excel Views
- Click the view "Users (Excel)"
- Set its context to "Issue Navigator" and submit (In versions prior to 2.2.0, choose the "Multiple Issues" type)
Now, go to the Issue Navigator, and a new option named "Users (Excel)" will appear in the "Export" dropdown. Click that, and your spreadsheet gets downloaded. Congratulations!
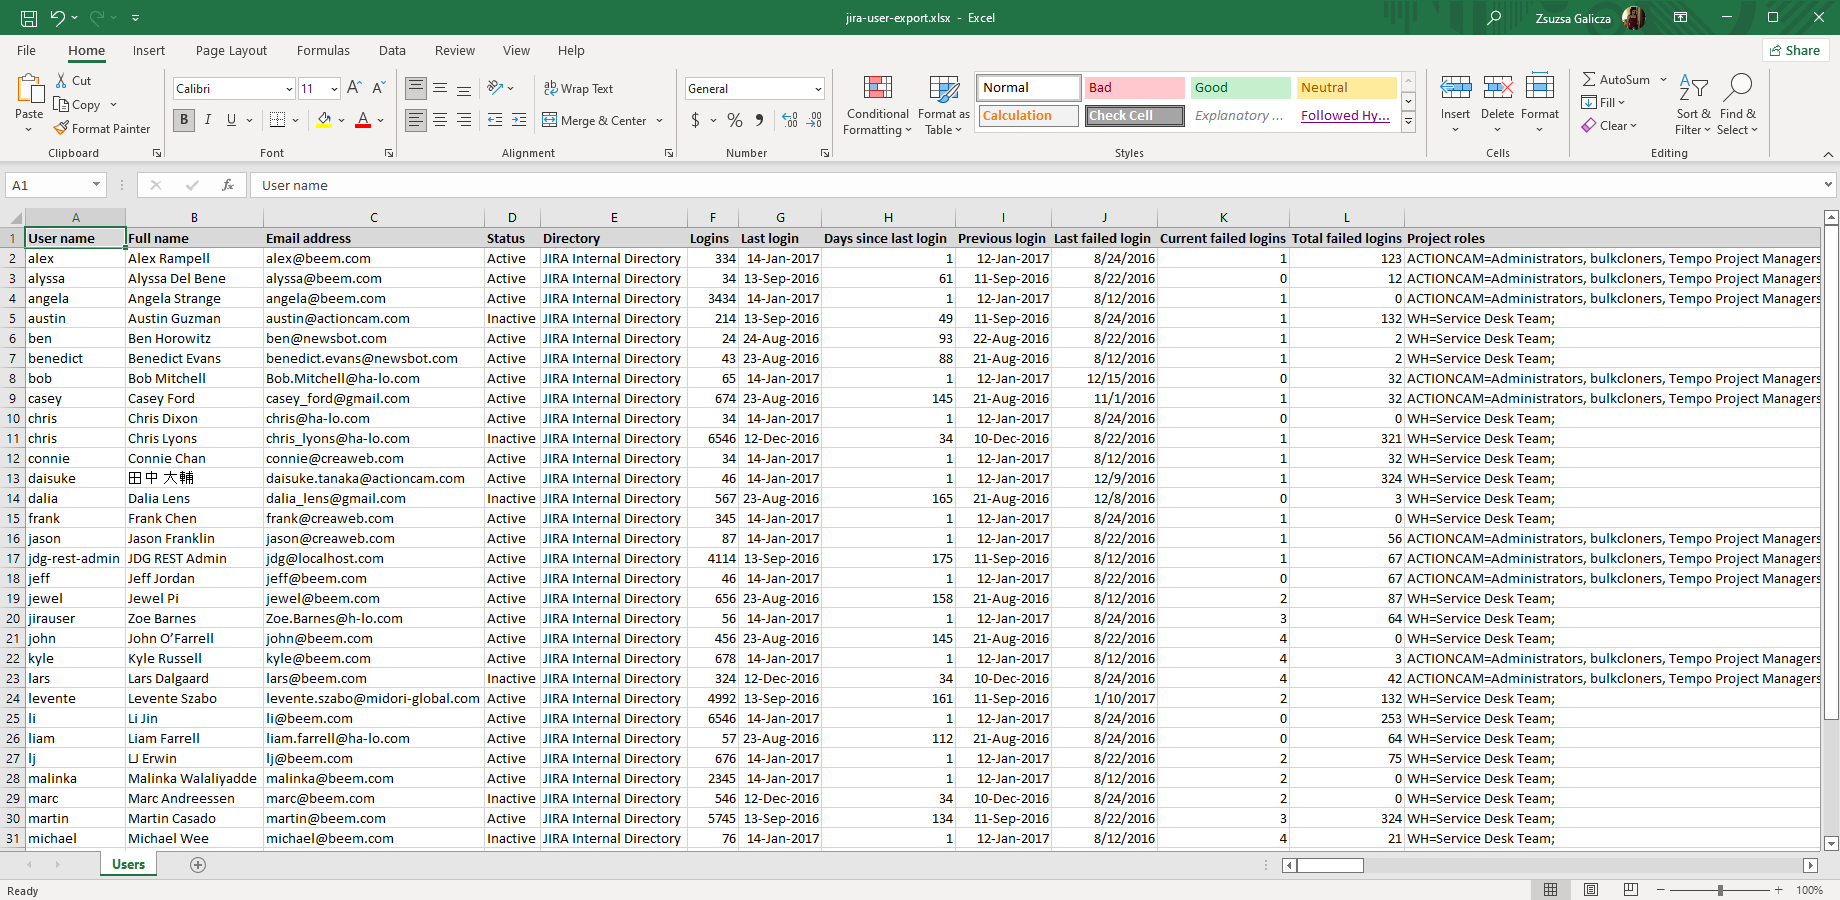
The Excel file will contain the following data for each user account:
- User name (login name)
- Full name (display name)
- Email address
- Status (Active / Inactive)
- Directory in which the user account is managed
- Groups in which the user is a member
- Login count
- Last login time and the number of days since then
- Last failed login time
- Current and total failed login count
- Project roles: the list of project keys plus the user's roles in those, in a single searchable, filterable cell. Ex: DROIDAPP: Developers, Users; IOSAPP: Developers, Users; WEB: Users;
Please note that the output (i.e. user data) will not depend on the issues you are looking at the Issue Navigator. It will export all user accounts, and we are using the Issue Navigator merely as an entry point.
Working with Jira users in Excel
Here are a couple of frequent user data related problems and their solutions in Excel. Even if the suggested solution is not 100% applicable to your case, that should give you some inspiration. (Excel is insanely powerful, be creative and use Google!)
Migrating user data to an external application
Post-process the user data in Excel, using search-and-replace, Excel functions, re-ordering or removing columns, and so on. Then import the post-processed data to the target application (contact database, CRM, mailing lists, etc.) in the XLSX format. If the target application cannot import XLSX, but can import CSV, then save your data from Excel to a CSV file.
Finding Jira users not logged in recently
Use the standard filter to show the rows where the days since the last login is greater than 365 days, for example.
Finding Jira users having difficulties with logging in
Use the standard filter to show the rows where the total count of failed login is greater than 20, for example.
Finding Jira users having access to a project
Use the standard filter with a criterion: "Project roles contains MYPROJ", where MYPROJ is the key of the project you're interested in.
Finding inactive Jira users
Use the standard filter to show the "Inactive" status only.
Customizing the user export template
As all other Excel export types, this one is also customizable to the smallest details. You want to remove some columns? Change the date format? Display a chart? This is all doable.
Please read the general template customization tutorial.
The two template files that are used to generate the user export:
- user-export.xlsx: the actual XLSX template (for layout, content, formatting, etc.)
- user-export.groovy: the Groovy script to access the additional information to export (login info, project membership, etc.)
Exporting user properties
Jira can store extra pieces of information for user accounts in form of key-value pairs. These are called user properties. Since Better Excel Exporter version 3.4.0, it is possible to export user properties to Excel.
For example, if you store the physical location of Jira users in the custom user property called "Location", you can access it with the following template expression:
${userExport.getProperty(jiraUser, "jira.meta.Location")}
This technique allows exporting location, phone number and any other custom user property to Excel with very low efforts.
Automation for Jira user exports
Better Excel Exporter supports powerful automation for any type of Excel reports, also including these user account exports. It is explained in the Excel automation tutorial.
You can utilize that mechanism, for instance, to send a user export to your mailbox periodically. Build a custom template that marks users not logging in for a year with red color, and create an automation rule to send that report to you each Monday morning! Simple, huh?
Upgrading from pre-2.0.0 app versions
User exports only work with app versions 2.0.0 or newer. If you are using an earlier version, you need to update your app version and create the missing templates. Please follow the steps below (takes 2 minutes).
- Upgrade your app version to 2.0.0 in the usual way.
- Download user-export.xlsx
- Download user-export.groovy
- Login to Jira as admin
- Go to Administration → Add-ons → Excel Templates
- Upload both files
- Go to Administration → Add-ons → Excel Views
- Create a new view named "Users (Excel)", enabled for the "Issue Navigator" context (in pre-2.2.0 versions choose the type "Multiple Issues"), and rendering the template user-export.xlsx.
Now, go to the Issue Navigator, and a new option named "Users (Excel)" will appear in the "Export" dropdown. Click that, and your spreadsheet gets downloaded. Congratulations!
Questions?
Ask us any time.