

In this page
Anatomy of a content status scheme
How it is used
Work with content status schemes
Create, edit, and delete content status schemes
Edit a content status scheme
Edit a content status
Factory default content status schemes
Advanced topics
Content statuses and quick actions
What is a content status scheme?
Content status schemes are the foundation of your content lifecycle management strategy. Individual content statuses don't work standalone. They work as part of a content status scheme, which defines which statuses exist and which content gets which status, based on CQL conditions.
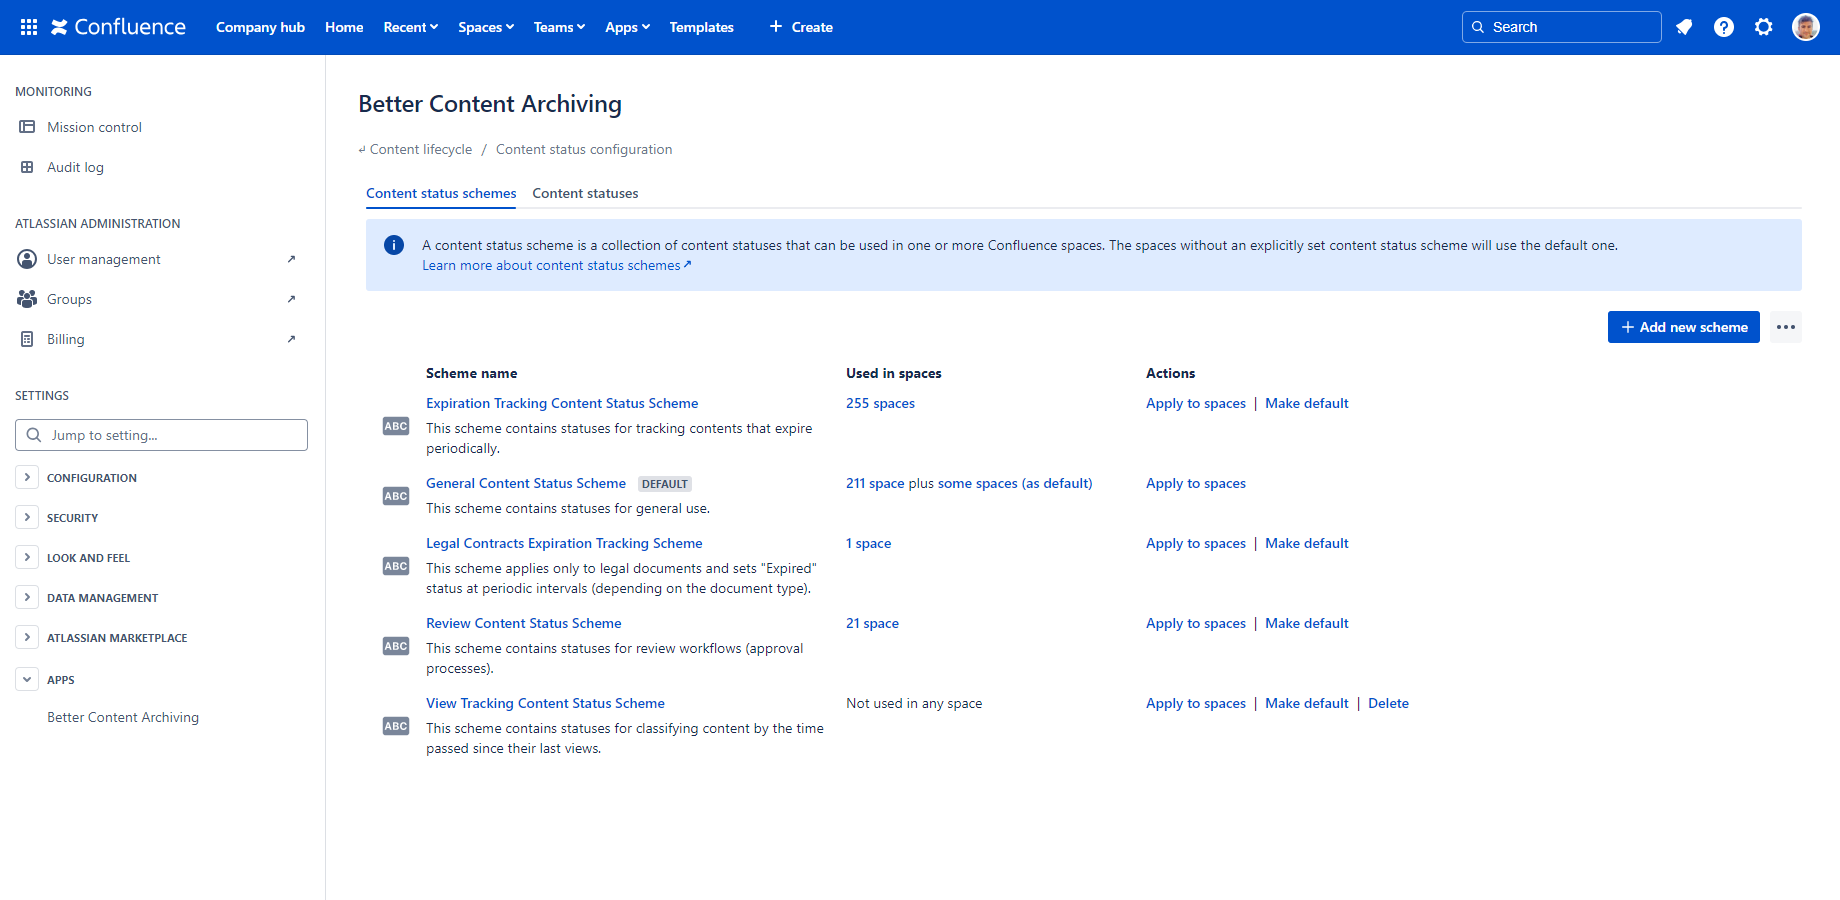
Anatomy of a content status scheme
A content status scheme has:
- a name
- an optional description
- an ordered list of content statuses
Each content status in the list, except the last, default one, has:
- a custom CQL (Confluence Query Language) query to specify which contents the status should be assigned to
- an optional recursive CQL query to also assign the status to descendant contents
The order of content statuses in the list is important: they are evaluated from top to bottom, and the first matching one is assigned.
How it is used
Content status schemes are used by the Refresh content statuses job. See how it works there.
Work with content status schemes
To work with content status schemes, navigate to Confluence Settings (cog icon "⚙" in the top right) → Apps → Better Content Archiving → Configuration → Content status configuration.
Content status schemes work the same way as any other scheme type. Learn more about schemes in general, how to work with them, and how to apply them to spaces.
After applying a new content status scheme to a space, or editing a content status scheme, run the Refresh Content Statuses job to reflect the change. You can run it manually, or just let its next scheduled execution do the work.
Create, edit, and delete content status schemes
You can create, edit, and delete content status schemes the same way as any other scheme type.
Edit a content status scheme
Click the name of a content status scheme to edit it:
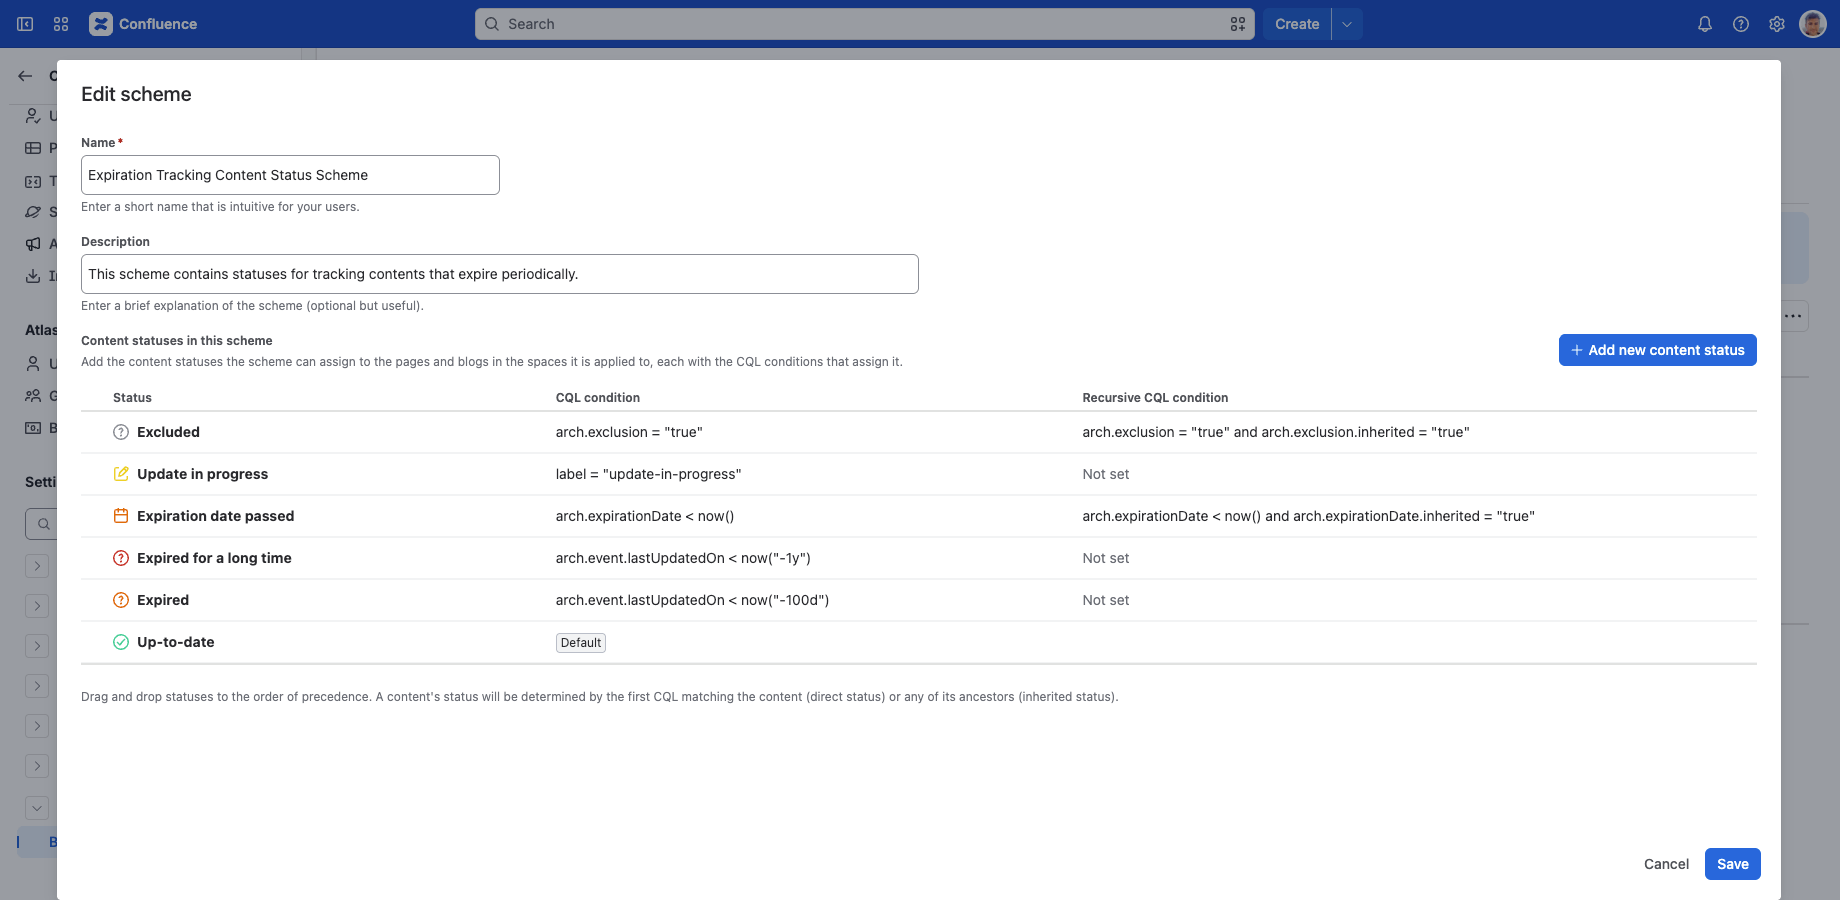
At the top, you can enter the scheme's name and an optional description. We recommend giving both an intuitive name and description. They also appear on other screens, such as when applying schemes to spaces, or when checking which scheme a space uses. This makes it easier to confirm that every space uses the correct scheme.
You can edit the content statuses contained by the scheme on the bottom part of the dialog. Use the Add new content status button above the list to add a new content status. Click the Edit icon on a content status to edit it, which opens a new dialog for that content status. Click the Delete icon on a content status to delete it; this permanently deletes it after a confirmation, and there is no undo. You can reorder the content statuses in the list simply by drag and drop.
Edit a content status
In the editor dialog, you can configure the following:
CQL query: (CQL field) Enter a CQL query. If a content matches it, this status is assigned to that content. This field is required for all content statuses except the last one. The last status is the default, acting as a fallback for contents that don't match any CQL query in the scheme.
Recursive CQL query: (CQL field) Optionally, enter a CQL query that is tested against a content's ancestors, such as its parent or grandparent, instead of the content itself. If any ancestor matches it, this status is assigned to the content. It allows implementing inheritance when the status depends on the ancestors.
CQL queries are evaluated from top to bottom, one by one, until a match is found. If none match, the default status is assigned. Put more specific statuses and CQL queries at the top of the list, and more generic ones towards the bottom. You can think of the status list like an if-elseif-...-elseif-else branching.
How to write stable and efficient CQL queries for statuses:
- Do not use ORDER BY to order results. These queries are only used as filters.
- Do not filter by space. For example, a status with CQL query space = FOO will never match if its scheme is applied to space BAR.
- Do not use type = "user" to search for users. Content status is assigned to pages and blog posts only.
- Do not use the currentUser() CQL function. Its value depends on where it runs. On the user interface, it evaluates to you, while in background jobs, it evaluates to the app user.
- Do not use the arch.status* and arch.previousStatus* CQL fields to test for a new status to assign. Doing so can cause a content to unexpectedly jump between statuses.
Factory default content status schemes
Right after installation, a few content status schemes are already created for you. Like all factory default schemes, they are designed to be intuitive, work well for most teams, and be conservative by default.
Note that when you reset the factory default content status schemes, the content statuses' IDs change, which will break existing CQL queries that use IDs. Update those queries with the new IDs.
Advanced topics
Content statuses and quick actions
This section explains an important dependency between content statuses and quick actions.
Several quick actions update dedicated CQL fields. For a status to work intuitively with a quick action, its CQL query should use the CQL field that the quick action updates, as shown in the table below, even if combined with additional conditions. For example, for the "Expired" status to react when a user sets an expiration date, its CQL query should use arch.expirationDate.
| This status ... | ... should use this CQL field ... | ... to work intuitively with this quick action |
|---|---|---|
| "Expired" | arch.expirationDate | Set/remove expiration date |
| "To archive" | arch.archivingDate | Set/remove archiving date |
| "Excluded" | arch.exclusion | Exclude/Include |
| "Expired" | arch.event.lastUpdatedOn | Update/Confirm |
This table is not a strict rule, but a recommendation for optimal user experience.
Questions?
Ask us any time.